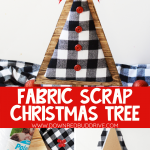


These beautiful DIY Wood and Fabric Christmas Trees are super easy to make! They make gorgeous Christmas home decor, and are so simple to put together!

This post may contain affiliate links. See my full disclosure policy HERE.
If you’ve read any posts on my site, you know I’m a HUGE proponent of crafts that don’t LOOK homemade. I love to be inspired by items I see in stores, and then re-create them myself!
These wood and fabric Christmas trees were inspired by something I saw in store, and then put my own twist on. I love how simple these were to put together, and the total cost was only about $5!
If you like decorative Christmas trees like these, you would also LOVE my Flannel Trees (you could even use scraps from this project to make them to match!), my jeweled trees, and my vintage button trees!
How do you make these DIY wood and fabric Christmas trees?
Step 1: Gather your supplies.

You will need:
- Wooden Christmas Tree (I found mine at Hobby Lobby for $2.50)
- Fabric (I used some buffalo plaid flannel I had on hand)
- Quilt Batting
- Cardboard
- Wood Stain or Paint (optional)
- Buttons
- Ribbon
- Hot Glue Gun
- Permanent Marker
- Scissors
Step 2: Trace and cut a cardboard triangle.

I started by staining my wooden Christmas tree. I used a Walnut stain, but you could stain yours, leave it un-stained, or paint it with an acrylic paint as well.
Once it’s dry, you can trace the triangle shape of the tree onto cardboard, and cut it out slightly smaller using sharp scissors or a box knife.
I wanted some wood to show around the outside of my fabric portion, so I made mine about 1/2″ smaller on all sides than the actual Christmas tree.
Step 3: Trace the cardboard triangle onto the quilt batting.

Quilt batting is kind of thin, so I traced my triangle twice and cut it out, so I could stack two layers.
Cut both triangles out and stack them on your cardboard triangle.
Step 4: Glue on your quilt batting to the cardboard.

Use a hot glue gun and glue on the quilt batting to the cardboard triangle.
I glued the first layer onto the cardboard, and then glued the second layer to the first layer. It doesn’t need to be perfect, because you’ll be covering it in fabric in the next step.
Step 5: Trace the shape onto the fabric.

Either use a permanent marker to trace about an inch around the outside of the triangle onto the fabric for cutting, or just cut about an inch outside the cardboard triangle.
Step 6: Cut out the fabric.

When your fabric is cut, it should look about like this. You want enough room to be able to wrap the fabric and glue it to the back of the cardboard.
Step 7: Glue on the fabric.

Use a hot glue gun to pull the fabric snug and wrap it and glue it.
You will glue the fabric onto the cardboard, with the quilt batting side down.
It should look about like the above picture when you’re finished.
Step 8: Attach the buttons, bow, and fabric triangle.

Use a hot glue gun to attach the fabric triangle onto the wooden Christmas tree.
Then glue on your buttons to the front. I used four vintage red buttons I had on hand, but you could use whatever you wanted.
I also tied a small red bow out of ribbon and glued it to the top to give it a finished look.
That’s all you need to be able to make your wood and fabric Christmas trees! Easily use scrap fabric, buttons, and ribbons to mix and match!
These would also be fun using old flannel shirts.
These would be PERFECT to make and sell at the holidays! The cost on them is low, and they look really great when they’re finished, and can be made in a variety of styles and color combinations!

Want more DIY decorative Christmas trees?
-


CLICK HERE -


CLICK HERE -

CLICK HERE
- Glass Gem Christmas Tree DIY – Make a super cute decorative jewel Christmas tree with just a foam cone and some hobby store gems!
- Bottle Brush Trees DIY – These quirky bottle brush Christmas trees are so incredibly easy to make!
- Sea Glass Christmas Tree DIY – If you want a beautiful beach-inspired piece of Christmas decor, you need to make this gorgeous Sea Glass Christmas Tree!
Use up those fabric scraps and old buttons to make these adorable wood and fabric Christmas trees this holiday season! You’ll be proud that you made this beautiful Christmas home decor yourself!