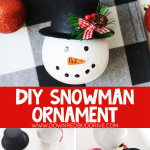


This adorable Snowman Ornament DIY is super cute and is so simple to make! His little hat is perfect, and you’ll cherish him for years to come!

This post may contain affiliate links. See my full disclosure policy HERE.
Snowmen are such a classic Christmas and winter staple for holiday decor. They’re fun, and whimsical, and just bring a smile to my face!
I’ve made snowman ornaments before, but this little one has a special place in my heart! Not only is it quick and easy to make, but turns out so cute and looks great on the tree!
If you like snowmen like I do, you should also check out my No-Sew Sock Snowman craft, my Hot Chocolate Snowman Ornament, and my adorable Mason Jar Lid Snowman (this one is ADORABLE!) too!
How do you make these Snowman Ornaments?
Step 1: Gather your supplies.

You will need:
- White Bulb Ornament
- Mini Snowman Hat (I found these at Hobby Lobby too, if you only need one)
- Permanent Marker
- Carrot Nose
- Box Knife
- Hot Glue Gun
Step 2: Slice a hole in the top of the snowman hat.

I found my white ornament at Hobby Lobby in the craft section, not in a boxed set. It’s a plain porcelain ornament, and was only like $1.50 with their 50% off sale.
I found the little hats in the same section, for about $1.00 each, BUT I just ordered mine in bulk from Amazon because I didn’t know Hobby Lobby had them!
I used a box knife to cut a little slit in the top of the hat to pull the ornament hanger through. My ornament came with the red ribbon already attached, but if you use a different ornament, you can tie on your ribbon yourself.
Step 3: Slide the ornament hanger through.

Poke the end of the ornament through the slit you made, and pull it through. This may take a second, but doesn’t take long.
Step 4: Glue on the snowman hat.

Once you have the ribbon pulled through, put a ring of hot glue around the under-side of the hat and pull it down and hold it in place while the glue dries.
Step 5: Add the face and hat decor to the snowman ornament.

Hot glue on the carrot nose to the center of the front of the snowman ornament. I found these adorable carrot nose buttons on Amazon, and I do a lot of crafts each year that use them!
Then use a permanent marker to draw on circles for eyes and a mouth.
To add the finishing touch to your Snowman Ornament DIY, I added a cute little piece of holly and berries. I stole this from an existing set of little ornaments I had and just glued it onto the hat.
You could also glue on a thin ribbon around the hat, and give him a little buckle for the hat from glitter foam as well. Whatever you think looks best!

Want more DIY Christmas ornaments?
-


CLICK HERE -


CLICK HERE -

CLICK HERE
- Feather Ornament DIY – They’re easy, and the end result looks so high-end no one will believe you made them!
- Napkin Ornament DIY – These ornaments are so easy to make and they turn out so very cute!
- Santa Seashell Ornament DIY – These ornaments are the perfect way to bring the beach to your Christmas tree!
Whether you make this adorable Snowman Ornament DIY for yourself, for someone else, or to sell at craft fairs, you will love how easy they are and how cute they turn out! Happy crafting!