How to Tie Dye | 5 Ways to Tie-Dye


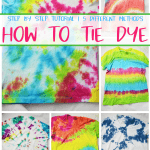
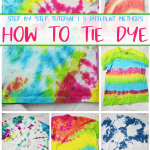
Want to know how to tie dye?! In this post you will learn how to tie dye using five different methods! There are so many different ways to tie dye, but these are some of my favorites and ones I’ve had success with over and over.
Keep an open mind as you look at the color combinations because they are totally customizable for you. You can even pick just a single color to make your design with, if you don’t want to use several colors.


This post may contain affiliate links. See our full disclosure policy HERE.
WHAT ARE THE STEPS TO TIE DYE?
- Get a clean white shirt to tie dye.
- Make it wet, and then wring out excess water so the dye soaks in better.
- Add rubber bands and follow the tie dye pattern of your choice.
- Wrap it in saran wrap and let it sit.
- Rinse the shirt until the water runs clear.
- Wash the shirt in cold water with no detergent.
Tie-Dye is a well-loved activity around our house. Every year we have a big get-together for the 4th of July and everyone creates their own shirt. We really enjoy tie-dying and have mastered a few ways that turn out awesome that we wanted to pass on to you! Here are 5 different ways to learn how to tie dye, and they’re not as hard as you think!
WHAT DO YOU DO AFTER YOU TIE DYE A SHIRT?
After tie-dying a shirt, wrap it in saran wrap and then let it sit. After it’s sat, rinse it out in cold water until the water runs clear.
HOW LONG DO YOU HAVE TO LET THE TIE DYE SIT?
For best results, you need to let your tie dye sit, wrapped in saran wrap, for 6-8 hours, or overnight. This will allow your colors to permeate your fabric and give you bold and beautiful patterns.
HOW DO YOU WASH A TIE DYE SHIRT FOR THE FIRST TIME?
Wash the shirts, one at a time, in the washing machine in cold water, WITHOUT detergent. If you use detergent you could end up with muddied colors, or worse yet, very pale or faded colors in your shirt. If you don’t follow these steps, your shirts will look like poo. And no one wants shirts that look like poo. Now let’s get started with how to tie dye!


WE LIKE AND USE TULIP DYE KITS!
Start off with your colors. Be sure to have GLOVES if you value the color of your skin. Also remember to wear gloves when rinsing, because your fingers will still turn blue. Not that I’m speaking from experience or anything. Be sure the rubber bands that came with your tie-dye kit aren’t old and rotted. If you need new rubber bands, you can check the dollar store. Okay, let’s get started with the How to Tie Dye.
LIKE WATCHING VIDEOS MORE THAN READING? SEE OUR FACEBOOK VIDEO TUTORIAL HERE!
How To Tie Dye
SINGLE SPIRAL


This is what a finished Single Spiral design will look like.


The first of the 5 ways in how to tie dye, we will start off with is the basic single spiral. You can start from the center of the shirt, which is traditional, or you can start the spiral anywhere you want on the shirt. Pinch the shirt between your fingers and twist. Keep the twist tight as you go so get the best results.


This is what it should look like when you’re done twisting the spiral. Here’s where you will keep the spiral tight, and put the rubber bands on the shirt to hold the spiral in place.


Once your rubber bands are on, the shirt should look something like this. Be sure to wrap your rubber bands tightly for the best results.


When you put the dye on the shirt, remember to saturate it well. Don’t go fast, but take your time. Squeeze a little dye on the shirt, then squeeze the shirt with your fingers a bit to be sure it absorbs the dye well. It should be totally saturated with color like the picture above for best results.
PRO TIP:
Wet your shirts down in cold water, and then ring them out so they’re damp before you begin the tie dye process. This will make sure your dye won’t just bounce off the fabric.
DOUBLE SPIRAL


This is what a finished Double Spiral design will look like.


The second shirt in how to tie dye is the double spiral. Like the traditional spiral, the spiral can start anywhere, this is just where we chose. Like the traditional spiral, pinch between your fingers, and spin tightly. Keep the spirals tight.


This is what the finished double spiral will look like before you wrap the rubber bands on. Just bunch the extra shirt pieces up that didn’t spiral and rubber band them in.


This mess is what it will look like when you’ve finished rubber banding the double spiral tie-dye method. Again, just put those rubber bands on tightly for best results.
STRIPES


This is what a finished Striped design will look like.


The third way in our how to tie dye are stripes! I LOVE how my shirt turned out with this method. It’s a great way to have all over color. If you want to leave white sections near the stripes, don’t put dye too close to the rubber bands. If you put the dye too close to the rubber bands, it will bleed in, and your colors will merge. I put mine close intentionally and LOVED the way it turned out!
AMERICAN FLAG


This is what a finished American Flag design will look like.


The fourth way in our how to tie dye is similar to an American flag! We did this one just for the Fourth of July and LOVE how it turned out! Start from the bottom corner of the shirt, and rubber band a few sections, every few inches. Leave the top un-rubber banded. The banded parts will be the stripes, and the top portion will be the blue part of the flag.


Wad the “blue” top portion of the shirt up and rubber band it together, so it’s not just solid blue when it’s finished. The white will give the illusion of stars and makes it turn out neat.


This is what it should look like when you’ve finished adding the color to it. It’s okay, as you can see, if you get dots of color here and there where they shouldn’t be. The beauty of tie-dye is that there’s freedom to make mistakes.
POLKA DOTS


The top portion of this (in blue) is what a finished Polka Dot design will look like. We combined polka dots and the American Flag design in the shirt above.


The fifth way in our how to tie dye are polka dots! All you have to do is pinch portions of the fabric, and then rubber band that. Dye the end portions you pinched one color, then dye the rest of the shirt another color! Then when you’re finished you’ll have polka dots!
Have you ever tie-dyed before? Feel free to ask us any questions in the comments! I hope you had fun learning how to tie dye!


