Hymnal Bouquet Tutorial

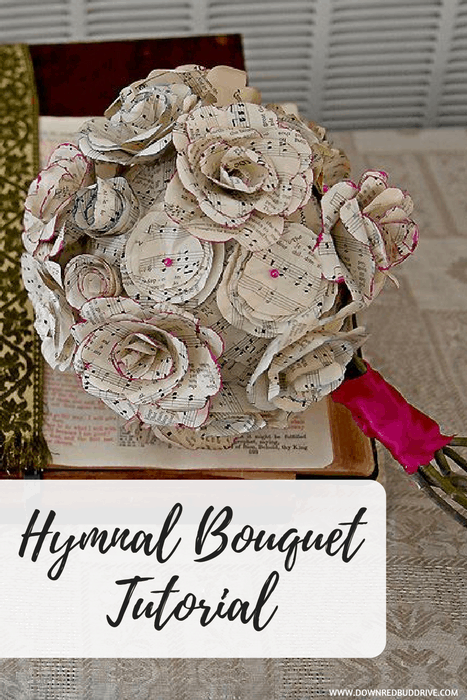

A while back I was asked to make a bouquet entirely out of hymnal book pages! I’d never done that before, and so I went in to it knowing I would need to experiment. I found some ideas that work, and it ended up being something the bride loved! I love the way the hymnal bouquet turned out! I’ve had a lot of people ask how I made it, and so I typed up this tutorial! It’s really not difficult to make a hymnal bouquet!
I used a 6″ styrofoam ball as the base. I used green, flexible, thin branches and pressed them into the base of the ball. I filled the spaces in the ball where I pressed the sticks in with hot glue. This holds everything in place, and makes it a secure handle to hold for the hymnal bouquet as well. Then use hot glue and torn pieces of paper to cover the outside of the styrofoam ball until it’s completely covered.
Now it’s time to cover the ball in flowers! There are three different types of flowers I used for this bouquet, and I’ll show you how to make them! I make all the flowers first, and then attach them with hot glue to the ball when I think I have enough to cover it.
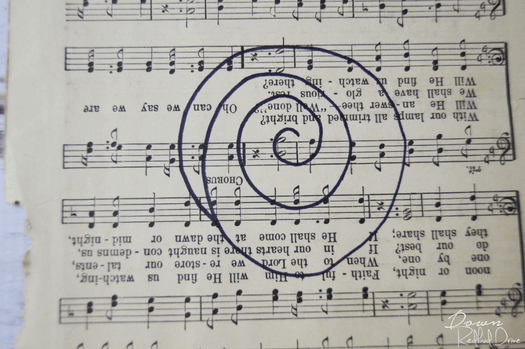

The first flower is a spiral cut flower. It’s super simple. Use a pencil (I used a black marker so you could see the design better) and draw a spiral design similar to the one I drew above. The bigger the design, the bigger the flower.
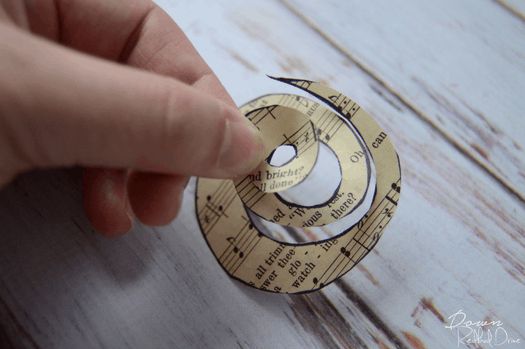

Cut the design out. Then you will start at the inside of the flower and pinch, twist and glue. Repeat this until you get to the end of your spiral, and you’ll have a pretty spiral rose. You’ll probably hot glue your fingers about a thousand times. Basically, you won’t have fingerprints at the end of the project. It’s worth it.
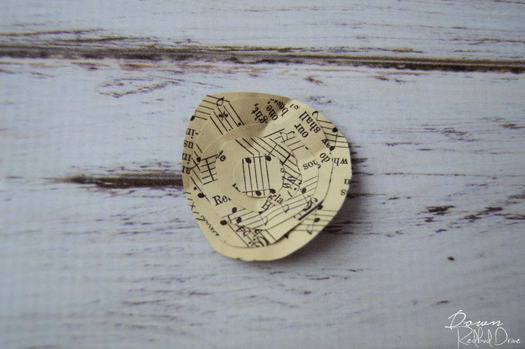

The next flower is a layered and stacked flower. This one is super simple as well. Just cut out several circles for each flower, each circle getting slightly smaller in size. I like to rub my thumb around the outside of the circles to make the edges kind of crinkly to give it a little 3D texture. Stack them on top of each other in order of size, with the smallest circle on top.
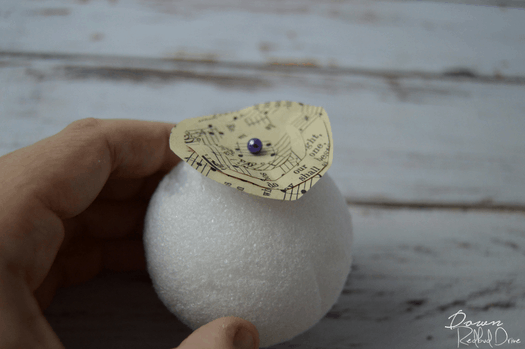

When you’re ready to attach the flower to the styrofoam ball, you will use hot glue on the bottom, and a stick pen with whatever color top matches, on top. Just press it in the center of the paper flower into the hot glue and styrofoam. Looks pretty, and is super simple. You can see here why I curl the edges of the paper slightly, so it stands up off the ball a bit.
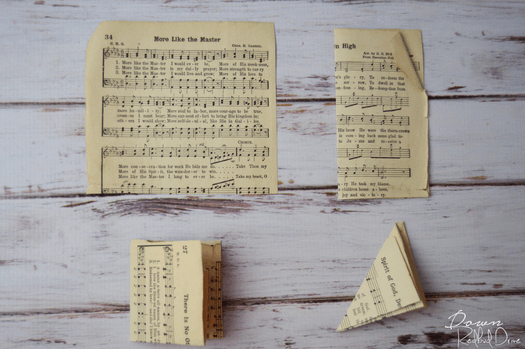

The third and final flower, has a bit more to it than the other, but it turns out the prettiest in my opinion. So, first you will need to cut your pages into a square. Then, you will fold each page like I showed you above. Each piece in the picture above is the next step of the fold.
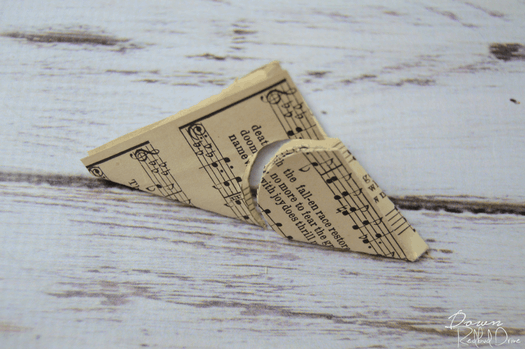

Then you will cut along the folded edge like shown above to make the petals. After you cut this shape out, also cut the bottom corner off.
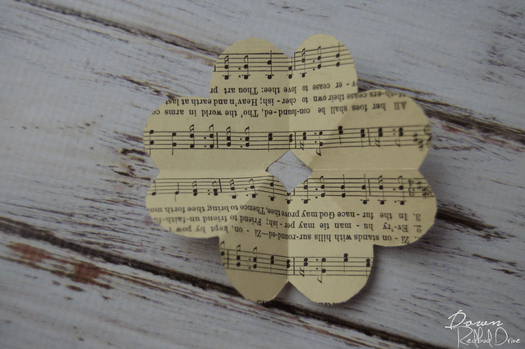

When you unfold the cut piece you just made, it should look like this. If it doesn’t try again, because you did it wrong. It’s okay, you’ll get it.


Next you will cut that shape into smaller shapes like this. These will become the different size petals for your roses. The smallest section will be your center, and the others will become petals. You will only need one of the single petals per flower, since it will be the center. So the following petals you cut can have sections of two, three, and four, instead of one, three, and four. Keeping up? Good, we’re moving on.


The next part is important. You will need to curl the edges of each petal to make it have a realistic rose appearance. You can use a pencil to curl the edges around, or you can just use your fingers, but the pencil is much easier. Just roll the edges around the side of the pencil.
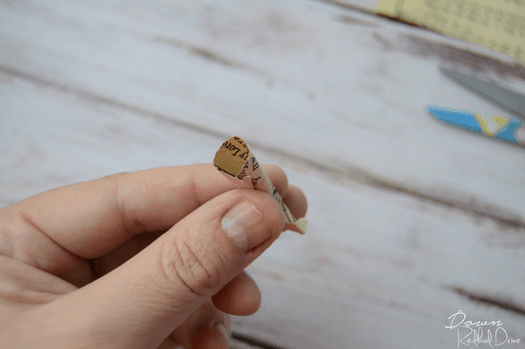

So as you begin your rose, you will start with your single petal center. You will roll it like the picture shows above, and then hot glue the edge to secure it. Then you will just begin wrapping and gluing the petals around the center. The rose will grow in size, and will quickly be the size of a real rose flower! When you get it to the size you want, you just stop adding petals, and then move on to the next flower.
Space the flowers out on your bouquet, and vary them in size and type and attach them to the ball. For this particular hymnal bouquet, I tipped the edges in color to match the wedding colors, per the bride’s request. I also use a small piece of satin to wrap around the handle to give it another pop of color, and to hold the branches together better.
These are really not hard to make, they’re just time consuming! If you can make the flowers above, you can make this hymnal bouquet easily! If I can do it, you can do it. Share your projects with us, and we may just feature them on our social media! We love it when you share pictures of things you’ve made from tutorials and recipes on our site!
*Bouquet images are provided by Melissa Griffitt with Griffitt Photography*
If you’d like to see another unique wedding bouquet upcycle, check out How To Turn A Wedding Dress Into a Bridal Bouquet!


