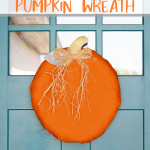

Spruce up for your front door with this easy and adorable pumpkin wreath! It’s an easy fall DIY project that can be completed in about 15 minutes!

This post may contain affiliate links. See my full disclosure policy HERE.
Making this wreath was an adventure! I had an idea in my head, but wasn’t 100% sure it was going to work. It worked, though! This is an easy way to make a cute pumpkin wreath without a bunch of gluing, wiring, wrapping etc.
How do you make this Pumpkin Wreath?
Step 1: Gather your supplies.

You don’t need a lot of things for this Pumpkin Wreath DIY. You can even mix it up if you want to customize this more to your liking, but I’ll tell you what I used to make it.
You will need:
- 18″ Straw Wreath
- Gold Faux Leather
- Free Printable Stem & Leaf Template
- Sticker Paper
- 1 yard of orange fabric
- Rubber Band
- Hot Glue Gun
- Floral Wire
- Natural Raffia
- 12″ of ribbon
- Faux Leaf (optional)
Step 2: Wrap the wreath in fabric.

Squeeze your straw wreath into the shape you want. I wanted mine to be more of an oval shape, so I kind squeezed it that way before I wrapped the fabric over the wreath form.
To wrap the wreath form, just lay your wreath on top of the orange fabric. Gather it up in your hand, kind of like making a ponytail in your hair. Make sure you pul all the bits tight, so you don’t have any wrinkles on the front of your pumpkin wreath.
Step 3: Trim the excess fabric.

Secure the fabric in place using a large rubber band. Wrap it tightly so the fabric doesn’t come loose later. Use a sharp pair of scissors, and trim all the excess fabric off the back. Leave about an inch of fabric, like pictured.
Step 4: Cut out the stem and leaves.

I didn’t trust myself to be able to cut out a stem and a leaf that looked right. Instead, I designed a printable template I could use as a guide to cut out the stem and leaves. You can print the template for free HERE.
I printed the template onto sticker paper, so I could cut out the sticker shape, and stick it onto my fabric. This makes cutting the stem and leaves out so much easier. I used faux gold leather for the stem, and I love the touch of glam it adds.
Step 5: Make the leaf stiff.

Faux leather is stiffer than regular fabric, but it’s still kind of floppy by itself. To remedy this, I hot glued a small strip of floral wire onto the back so I could bend it how I needed. You could do the same with the leaves if you make them this way too.
Step 6: Attach the leaves, stem, and bow.

To finish off your Pumpkin Wreath DIY, you will need to attach the stem, leaf (or leaves) and a bow! I used a fake floral leaf I had leftover from making these super cute Embroidery Hoop Pumpkins, but you could easily use the printable template to cute out a leaf or two.
Tie a bow out of natural raffia and trim it to a length you like. Use hot glue to first attach the stem, then attach the leaf, and lastly the raffia bow.
Grab a piece of 1″ grosgrain ribbon and cut it to about 12″. You can make it longer or shorter depending on how you want it to lay on your door when you hang your pumpkin wreath. Hot glue it to the back of your wreath to make a hanger.

I made my hanger a little shorter, because I didn’t want to see it hanging on the door. Use a wreath hanger on your door to hang it as a cozy greeting for fall!
Want some more Fall DIY projects?
- Mason Jar Lid Pumpkins – these are SO cute and make adorable fall decor!
- No-Sew Fabric Pumpkins – These are one of my all-time favorite fall DIYS! They look so cute on my bookshelf!
- Burlap Pumpkin Wreath – this cute little wreath utilizes burlap and some fun orange fabric to make a fall-themed door greeting!
- Embroidery Hoop Pumpkins – These are such a simple DIY that has such a dramatic appearance! These are the best way to customize your fall decor to match your regular home decor!