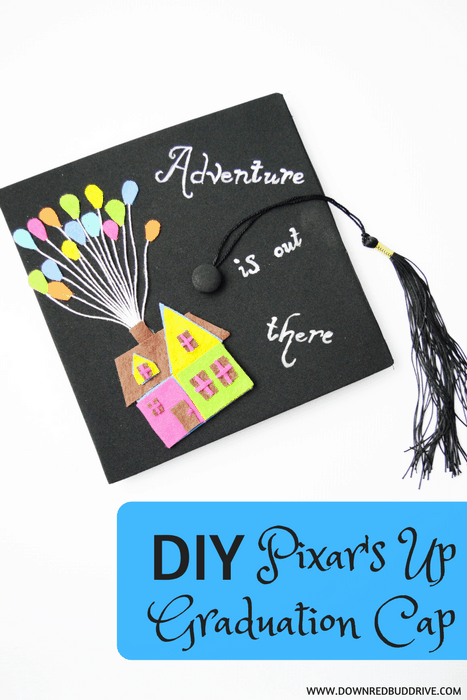
DIY Pixar’s Up Graduation Cap


For at least the past ten years, kids and adults of all ages have been decorating their graduation caps into works of art. Gone are the days of the boring black cap. Instead, people have used the top of the graduation cap as a canvas to create whatever they want. They sky’s the limit when it comes to crafting, and lots of people go all out!
Pixar’s movie, Up, has always held special meaning for me. When I think graduation, specifically high school or college graduation, I think about how it’s not the end of something, but the beginning of the rest of a life. It’s a fresh start into the world. Adventure is out there, only seems fitting for someone graduating.
This idea would be cute for any graduating class: Kindergarten, Eighth Grade, High School, College or whatever the kids are graduating from these days. You only need a few supplies to make this, so it’s not difficult. Use your creativity and do it yourself! Here’s how to make the DIY Pixar’s Up Graduation Cap.
You will need:
Graduation Cap
Scissors
Felt of many colors (not to be confused with a coat of many colors)
String
Hot glue gun
White paint (or white paint marker)
Paintbrush (if not using a paint marker)
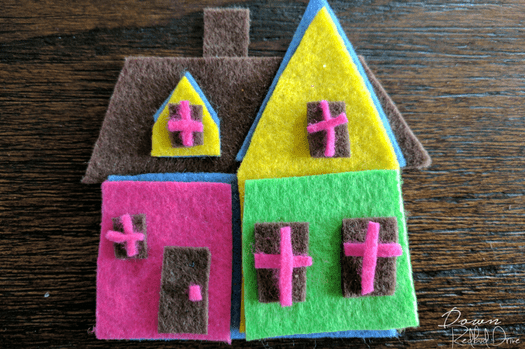

I didn’t follow a pattern to make the house. I did cut out all the felt pieces BEFORE gluing any of it together. I just googled the Up house, and kind of roughly based my design on that. The house as a whole was about 4″ x 4″. When you go to glue the house together, start with the largest pieces first. You should work your way from the back to the front this way. Hot glue each piece together. I used the colors: dark brown, sky blue, lime green, yellow, and pink. Hot glue all your pieces together, and be sure to glue your chimney on the back on the roof of the house. This house is whimsical, so cuts and lines don’t have to be perfect. It adds character for it to be a little “off.”
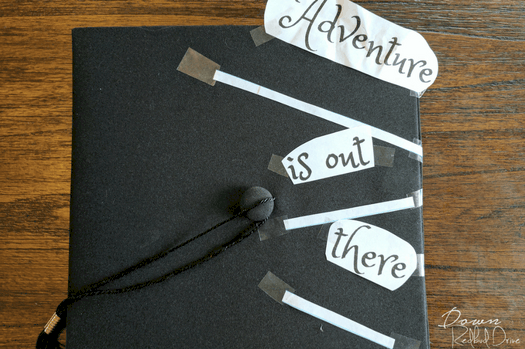

Next in your DIY Pixar’s Up Graduation Cap comes the part that stressed me out. Painting the letters. I’m no good at freehanding, and I ALWAYS make my letters slant weird when trying to follow an invisible line. I cut out individual lines from notebok paper and taped them to the hat so I could follow it. I also picked a font I liked, and used it as my guide. I practiced writing the words in the font on a sheet of paper first, then I was ready to paint. Use a firm, thin line paint brush and white acrylic paint or a paint marker. I would have used a paint marker, but I forgot to buy one. I taped my words above the lines so I could see how far apart I needed to space the letters etc. You can see that my one year old thought that my “adventure” needed to be smashed and crinkled. Using this as a guide just helped. You can download the pdf I made with the letters the correct size HERE!
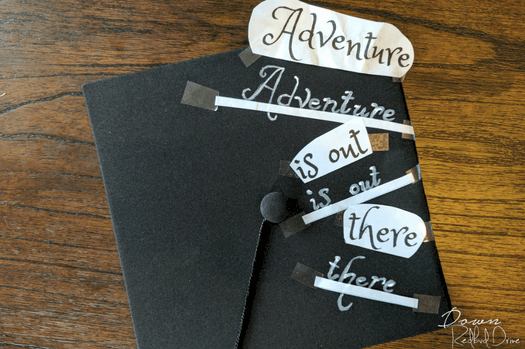

This is how my letters looked when I was finished painting. Not perfect, but it doesn’t need to be. You are almost done with your DIY Pixar’s Up Graduation Cap!
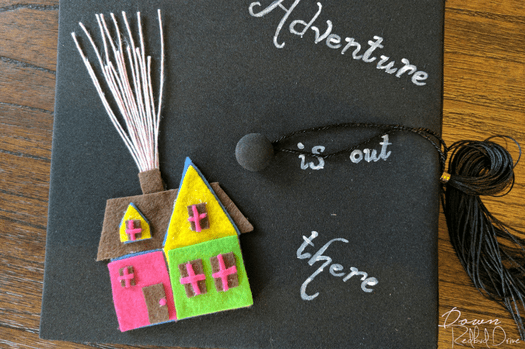

Cut out small balloon shapes (again, no need to be perfect here) using the colors you have left over (except for the brown.) I used 15, but you can use as many as you want on the cap. Cut as many strings as you have balloons in 5″ sections. Then even those up and glue them to the back of your chimney piece. Now glue down your whole house and place it on the cap. Spread your strings out, and then cut every other string about an inch or two shorter. Once your smoothed the strings out and cut them, place a dot of hot glue on the back of each balloon and glue it at the end of the string.
Once you’ve done all of those steps, you’re officially done with your awesome DIY Pixar’s Up Graduation Cap! If you made this, we’d love for you to email us a picture at downredbuddrive@gmail.com! Who knows, it may end up on one of our social media accounts!
Want some other DIY projects? Check these out:
Stuffed Animal Corner Cage
How To Shabby Paint With Water


